
Summary: I installed the Aeotec Garage Door Controller in my house. The Garage Door Controller runs on Z-Wave, so I needed to have a hub with it. I used the Hubitat Elevation Hub to get it running online.
As a tech nerd, I am pretty sure you have heard of the company Aotec, creators of home automation products and specialists in Z-Wave. Any smart things that you can think of, Aotec has probably had it!
If you want an upgrade on your garage door, the Aotec Garage Door Controller is definitely one of the best recommendations.
This smart door garage controller is designed to monitor whether a garage door is open or closed. It also uses the Z-Wave security which supports the Over the Air (OTA) for the firmware upgrade.
I have installed this smart thing in my home and I’m about to share my experience in the succeeding sections. Keep reading!
Why do I need a Smart Garage Door Controller?
I was hoping that installing a Smart Garage Door ‘Opener’ like the Aeotec Garage Door Controller was going to give me the opportunity to automate my garage door.
Here’s the thing:
We already use automatic garage door control every day- don’t we? I mean, we open the garage door usually by pressing a button as we drive up to the house, or use a code at the garage door panel.
But, why do I need a Smart Garage Door Opener?
- I wanted
to have the opportunity to open my garage with a command. That’s the real difference here. I wanted to say ‘Ok Google, Open my Garage Door‘, or, - if I was not in the vicinity of my home, I wanted to control the door opener with an app to open the door remotely – this would allow family or contractors to enter the garage if required.
- I could have a camera set up in the garage to link with the garage door opener to ensure that I knew what was going on, for security.
- I could get an indication or notification on my phone when the garage door was open.
Still, smart garage doors, in general, comes with pros and cons. I have summarized it in the table below!
| PROS | CONS |
| makes opening and closing garage doors or gates effortless | complex installation |
| heightened safety and security | susceptible to hacking |
| can’t lose the controller | expensive |
| can be linked to other security home gadgets |
Aeotec Garage Door Controller Setup
I started to read through the instructions for the Aeotec Garage Door Controller from their website.
The Aeotec Support Page shows you how to “Include” (connect) your Z-Wave device (garage controller) to your Hub. It’s pretty intuitive to reset and connect the Z-Wave device. We’ll talk about this in another article.
In this scenario, I used the Hubitat Elevation Hub. I pressed the small button on the back of the controller and hold it down to reset. Press the button again, and the device will talk to the Hub. Pretty neat!
Moving on, the tilt sensor! The tilt sensor is required to let the garage controller know when the door is being opened. You have to attach the tilt sensor at least 5 feet off the ground.
I think the intent here is that you’re putting the tilt sensor on a panel that will actually tilt at the proper time to let you know when the door is being opened and when it’s actually closed.
Installation is pretty simple. You can screw (supplied) the backplate to your garage door panel, or just use the 3M tape that comes in the box.
Aeotec Garage Controller Installation
I must say there was some trepidation about installing something on my existing garage door. What happens if I mess something up? What if I permanently destroy the wiring or break the actual garage door operator?
I thought I’d call my trusty garage door company contact, John from Atlas Overhead Door Company, Ltd. Thank you,
The instructions show you how to connect the wiring to the main switch on your wall. I couldn’t open up the switch it; was pretty much stuck! How do I access the wires!?
I called John. He was intrigued. He started to walk me through it. He told me that I don’t need to access the wires behind the panel; just go to the garage operator. I would have access to power and access to the wires right there.
He was right. The thing about the controller is that you need access to a 120V receptacle. The adaptor cord was not long enough anyway to mount the controller by my existing garage door opener.
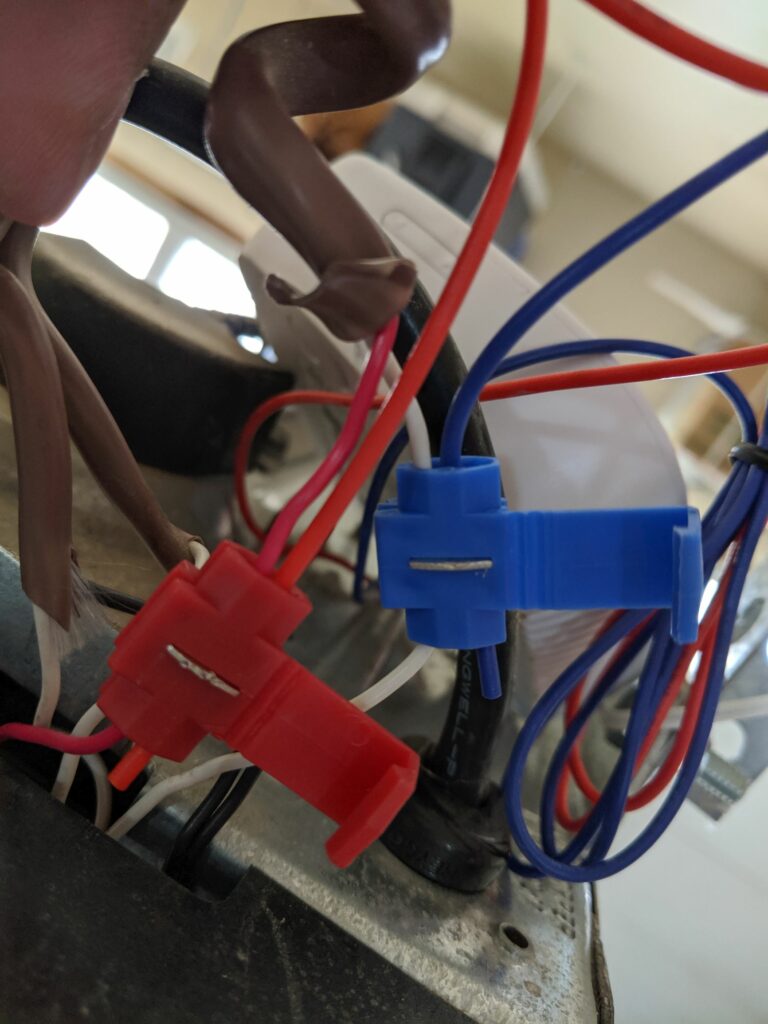
So, UP I went on my ladder. Safety glasses and gloves – safety first! John walked me through the wiring over the phone. He said that you should have 3 contacts and 3 colors. Yes, I had 3.
One of them is a common wire. Just install the red and blue wires to terminals 1 and 2. Make sure I wrap the wires back in the clockwise direction (‘righty-tighty, lefty-loosey‘) to help them twist into place when I screw them back in. Really good instructions.
Aeotec provides these really neat clips that don’t require you to expose your existing wires. You just connect the two wires in each clip, and ‘CRIMP’ them together. That’s it!

After connecting the wires above my garage operator, I left the Aeotec Garage Controller resting (ok, maybe hanging) from the operator. I did not need the button on the Aeotec Garage Controller to operate the garage. I had the existing one already on the wall.
Installing the Garage Controller from Aeotec was an exercise to see how much effort it takes to install devices like this. It’s possible that installing an Ecobee or Nest thermostat could be more complicated (more wires, more errors?). However, I think the simplicity came from planning ahead and talking it through a few minutes prior to installation.
Aeotec Garage Door Controller Automation
Did I get what I wanted out of this exercise? The Aeotec Garage Controller is a remarkable product with components that are top-notch, and the installation is quite simple.
The next step was to find ways to connect it to the Z-Wave Hub; the Hubitat Elevation (HE). The Hubitat Elevation found the device, no problem. However, the HE did not have a driver for the Aeotec Garage Door Controller; it had a ‘Generic Z-Wave Garage Controller’ device.
How do I integrate the device to Google Home from the Hubitat Elevation Hub?
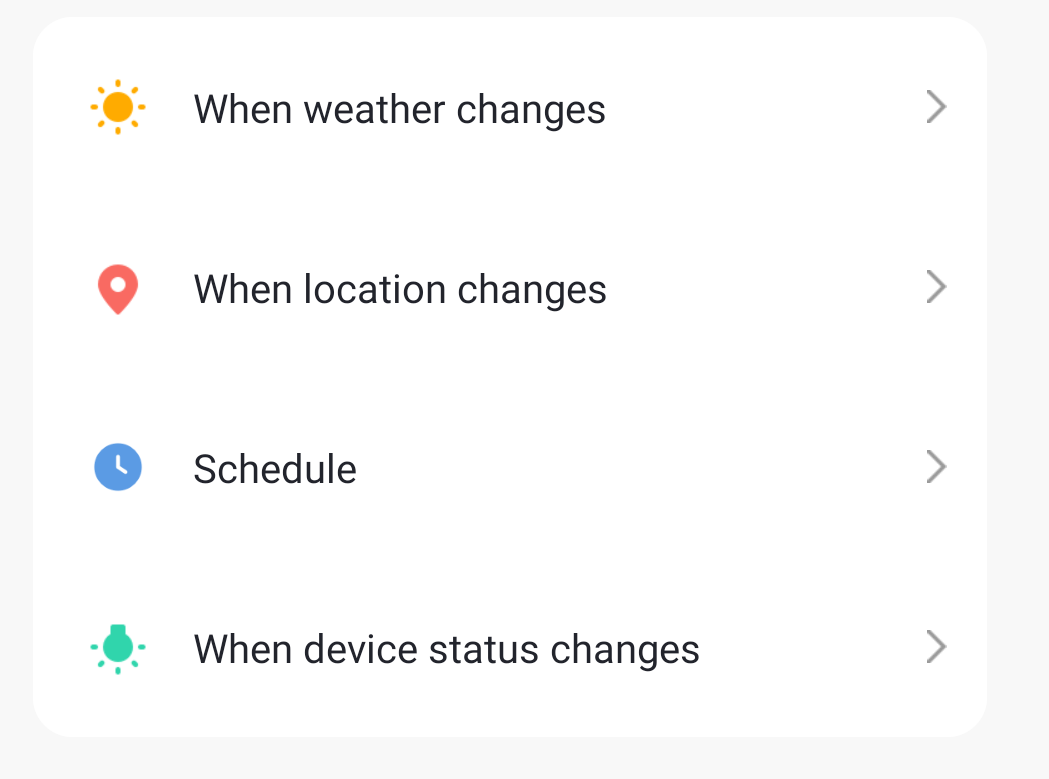
I went on to Hubitat Community on what to do next. The Hubitat community told me that in order to get the device to integrate I would need to create a Rule or Virtual Switch.
It’s not as simple as just connecting or syncing the device with Google Home. It won’t pick it up as a compatible device just yet. Some say this is because Google does not want voice commands without the proper authorization to open a garage door or your front door lock.
It makes sense, however, this means, I have to find another way to get the door open by voice. Here are things you can do right away:
- Open the door remotely with the Hubitat App (Dashboard).
- Get notification of door Opening, Open, and Closed.
- Have a camera set
However, I did not get the last thing; to get voice command…. yet. I’m working on it.
I know that there are other devices on the market that work at integrating Google Assistant or Alexa; however, it’s not immediately compatible. The Aeotec Garage Controller is a great device and the Hubitat Elevation is a great hub. I just need to work out the solution to the problem.
Aeotec has already announced its new Gen7 products. You can read about it in our article: Aeotec 700 series Z-Wave Gen 7, Z-Wave Plus Version 2. There should be exciting opportunities to improve my garage automation with the new Gen7 products.
Thank you for reading. Hope this helped you. I hope to continue testing out new devices and sharing my experiences here on AutomateYourLife.
If you have a solution or would like to share what you do for your smart garage door, please share it with us!
In the meantime, Don’t Hate, Automate.
On a side note, if you’re looking for other options for high-quality smart garage doors, watch the video below!
Pingback: Don’t Hate, Automate – Smart Home Product Reviews – S1 EP2 – The World That Come