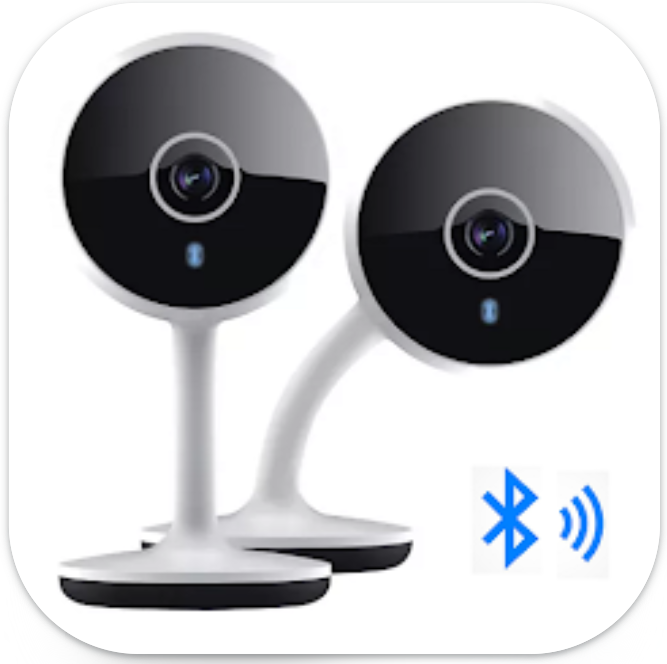
Welcome to the world of Geeni smart home security! Setting up your Geeni camera is pivotal to creating a connected and secure living space.
Geeni cameras have gained popularity for their affordability and advanced features, providing users with the ability to monitor their homes with ease.
Whether you’re a tech enthusiast or a homeowner seeking reliable surveillance, this article will walk you through the Geeni camera setup process.
As technology continues to redefine home security, Geeni cameras stand out for their user-friendly design and seamless integration into the Geeni app ecosystem.
This guide is tailored for both newcomers and those seeking a refresher on the setup process.
Whether you’re looking to enhance your home’s security or simply want to keep an eye on things while you’re away, this Geeni camera setup guide aims to empower you with enough knowledge to keep your home surveillance system safe.
| Aspects highlighted | Description |
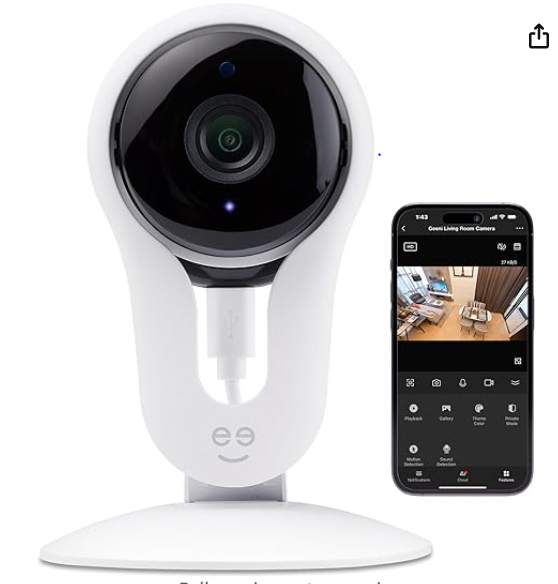
| Geeni app | Geeni cameras seamlessly integrate into the Geeni app ecosystem, offering a user-friendly design. |
| Setting up Geeni | To program your Geeni camera, download and install the Geeni app, create an account, and follow the app’s instructions. |
| Wi-Fi requirement | Geeni cameras need a Wi-Fi connection, enabling remote access, live feed viewing, and notifications through the Geeni app. |
| Red light | The red light on your Geeni camera indicates its startup or initialization process. If it persists, it might signal connection issues or firmware updates. |
| Resetting Geeni | Resetting your Geeni camera involves locating and pressing the reset button, holding it for 10 seconds, and releasing it. |
What to do to program Geeni?
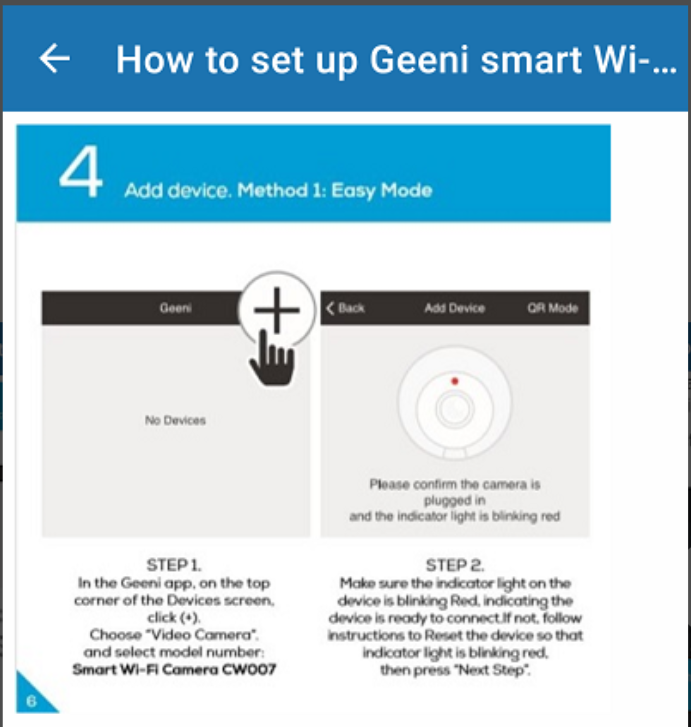
To begin setting up the Geeni camera, ensure you have downloaded and installed the Geeni app.
This app is your central hub for controlling and managing all your Geeni-compatible devices. Access the app, create an account, or log in if you already have one. This account will link your Geeni and mobile devices, allowing for seamless control and customization.
Next, follow the instructions provided by the Geeni app to set up your specific device.
This usually involves plugging in or installing the device, such as a smart plug or light bulb, and ensuring it is powered on.
The Geeni app will then guide you through connecting your device to your home Wi-Fi network.
Ensure your Wi-Fi credentials are accurate, and follow the on-screen prompts to complete the connection. Once connected, your Geeni device will be accessible through the app.
Explore the app to discover the features and customization options for your Geeni device.
Depending on the type of device, you may be able to set schedules, create scenes, or control it remotely. If you encounter any issues during the setup process, refer to the Geeni app’s help or support section for troubleshooting tips.
Do Geeni cameras need Wi-Fi?
Yes, Geeni cameras require a Wi-Fi connection to function properly.
The Wi-Fi connection serves as the means for the Geeni camera to communicate with the Geeni app on your smartphone or tablet. This connection allows you to remotely access and control the camera, view live feeds, and receive notifications.
During the initial setup of your Geeni camera, you’ll be prompted to connect it to your home Wi-Fi network.
This process involves entering your Wi-Fi credentials into the Geeni app, which then configures the camera to connect to your specific network.
Without a Wi-Fi connection, the Geeni camera won’t be able to transmit the live video feed or send alerts to your mobile device.
The Wi-Fi connection is essential for the seamless integration of the camera into your smart home ecosystem, enabling you to monitor your space remotely and make use of the camera’s features through the Geeni app.
It’s important to ensure that your Wi-Fi network is stable and has sufficient coverage in the area where you plan to install the Geeni camera.
This ensures a reliable connection and optimal performance for your Geeni smart camera.
Is it possible to use Geeni while being away from home?
Yes, it is indeed possible to use Geeni devices while you’re away from home.
Geeni smart devices, including cameras, are designed to be accessible remotely through the Geeni app on your smartphone or tablet. This feature allows you to monitor and control your Geeni devices from anywhere with an internet connection.
To use Geeni devices when you’re away, ensure that both the Geeni device (e.g., camera) and the device you have the Geeni app installed on are connected to the internet.
The Geeni camera needs to be connected to your home Wi-Fi network, and your mobile device should have an active internet connection, either through cellular data or another Wi-Fi network.
Open the Geeni app on your mobile device and log in with your Geeni account credentials. Once logged in, you should see a list of your connected Geeni devices.
Select the camera you want to monitor, and you’ll be able to view the live feed, access recorded footage, and control any applicable features remotely.
This remote access feature is useful for checking in on your home, pets, or loved ones while you’re away. It provides peace of mind and the convenience of managing your Geeni devices even when you’re not physically present at home.
What does the red light on my Geeni camera show?
The red light on your Geeni camera typically indicates that the camera is in the process of booting up or initializing.
When you first power on the Geeni camera or during a reset, it may display a red light temporarily as part of its startup sequence.
If the red light stays on for a long time, it can indicate that there is a problem with the connection or configuration of the camera.
It’s wise to examine the camera’s internet connection in such circumstances. Make that the network is operating effectively and that the camera is connected to your home Wi-Fi network correctly.
Another scenario where you might see a red light is during the initial setup or when the camera is undergoing a firmware update.
Firmware updates are essential for maintaining the security and functionality of your Geeni camera. During the update process, the camera may display a red light temporarily.
If the red light continues to be a cause for concern or if you encounter issues with your Geeni camera, it’s recommended to refer to the camera’s user manual or the Geeni support resources.
Troubleshooting steps and specific guidance from Geeni support can help identify and address any issues with the camera’s operation.
For what reasons are Geeni cameras not getting connected?
The failure of Geeni cameras to establish a connection could be caused by various factors. First, make sure the camera is in the Wi-Fi coverage area.
The signal quality may be poor if it is too distant from the Wi-Fi router, which could cause problems with connections.
An incorrect password or network name can prevent the Geeni camera from connecting to the Wi-Fi network.
Double-check and re-enter the information to ensure accuracy. It’s also essential to ensure that your Wi-Fi network is working correctly. If there are issues with your internet connection or router, the Geeni camera may struggle to establish a connection.
Another potential reason for connectivity problems could be interference from other electronic devices.
Signals from devices like cordless phones or microwave ovens can interfere with the Wi-Fi signal, impacting the camera’s connection.
If you’ve recently changed your Wi-Fi password, you’ll need to update the Geeni camera with the new credentials. Lastly, make sure that your Geeni camera firmware is up-to-date.
Outdated firmware can lead to compatibility issues and connectivity problems.
What can you do to reset the Geeni camera?
Resetting your Geeni camera can help resolve issues or prepare the device for a fresh setup. For this purpose, first of all, locate the reset button on the Geeni camera.
This button is usually a small, recessed button that may require a paperclip or a similar tool to press.
Press and hold the reset button for about 10 seconds.
As you hold the button, you may notice the camera’s indicator light flashing. This indicates that the reset process is in progress.
Release the reset button after the 10-second duration. The Geeni camera will then reboot, and this resets the device to its default settings.
After the reset, you might need to set up the Geeni camera again.
Use the Geeni app on your smartphone or tablet to reconnect the camera to your Wi-Fi network and configure any specific settings.
Keep in mind that resetting the Geeni camera removes any personalized settings or configurations you had previously applied.
If you have specific questions about the reset process or encounter any issues, consulting the Geeni user guide or reaching out to Geeni support can provide additional guidance.
Final Verdict
In this article, we discussed:
- Setting up your Geeni camera is a crucial step for creating a connected and secure living space in the realm of smart home security.
- Geeni cameras are known for their affordability and advanced features, offering users the ability to remotely monitor their homes.
- The user-friendly design and seamless integration into the Geeni app ecosystem make Geeni cameras accessible to both tech enthusiasts and homeowners seeking reliable surveillance.
- Downloading the Geeni app, making an account, and following the setup instructions are the steps involved in setting up a Geeni camera to connect to your home Wi-Fi network.
- For best results, Geeni cameras need a steady Wi-Fi connection. This allows users to view live feeds, get notifications, and operate the camera from a distance.
- The Geeni app makes it possible for customers to remotely monitor and control Geeni devices from any location with an internet connection.
- The red light on your Geeni camera typically indicates that the camera is in the process of booting up or initializing.
- Press and hold the reset button for about 10 seconds. As you hold the button, you may notice the camera’s indicator light flashing. Release the button and the camera will reset.
Other Articles
- Can I Delete My Blink Account And Start Over
- How Do I Unregister a Blink Camera From Another Account
- How Do I Give Someone Access to My Blink Camera
- Wyze Camera Keeps Disconnecting